Cerebral cisterns and subarachnoid spaces
This web page presents the anatomy of cisterns and subarachnoid spaces by means of MRI.
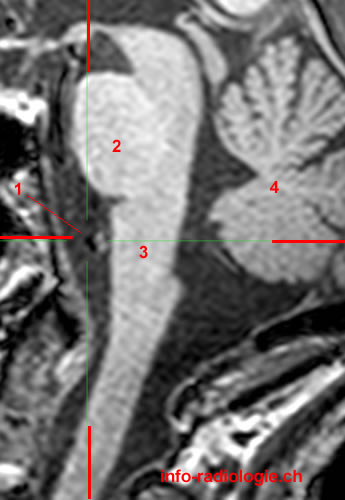
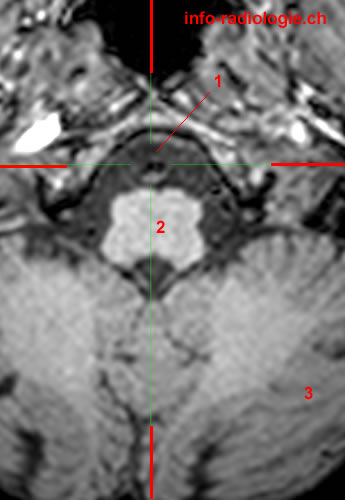
Premedullary cistern

Brain MRI: sagittal T1-weighted cut. 1, Premedullary cistern. 2, Pons. 3, Medulla. 4, Cerebellum.

Brain MRI: axial T1-weighted cut. 1, Premedullary cistern. 2, Medulla. 3, Cerebellum.

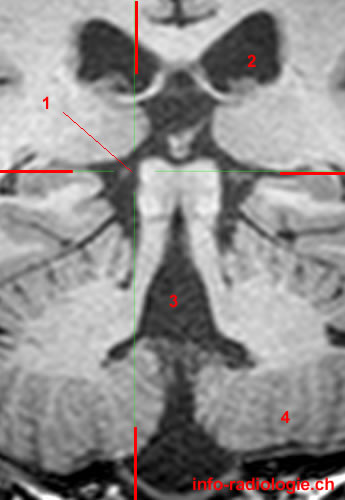
Brain MRI: coronal T1-weighted cut. 1, Basilar artery in premedullary cistern. 2, Spinal cord. 3, Hippocampus.
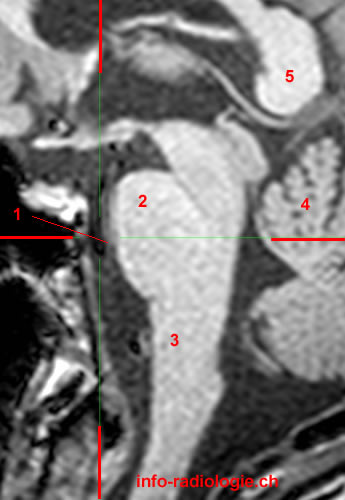
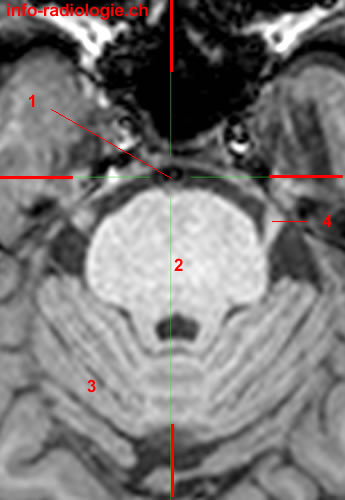
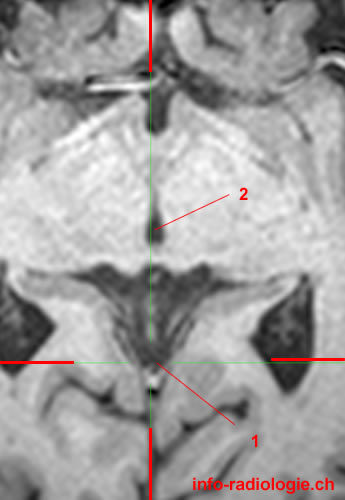
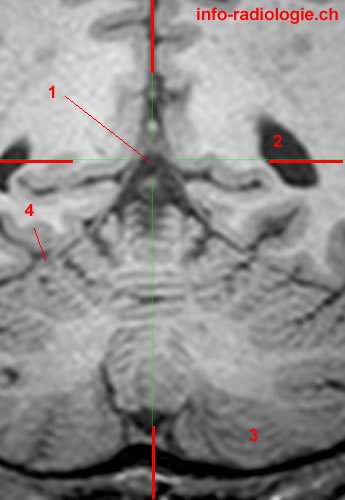
Prepontine cistern

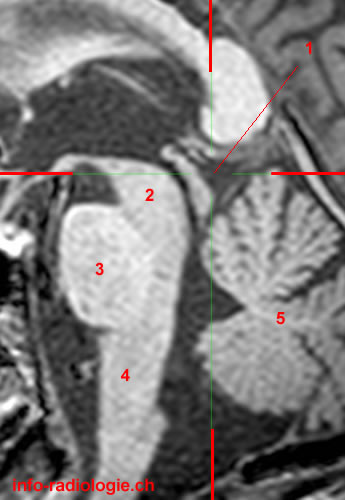
Brain MRI: sagittal T1-weighted cut. 1, Prepontine cistern. 2, Pons. 3, Medulla. 4, Cerebellum. 5, Splenium, corpus callosum.

Brain MRI: axial T1-weighted cut. 1, Basilar artery in prepontine cistern. 2, Pons. 3, Cerebellum. 4, Cranial nerve V.

Brain MRI: coronal T1-weighted cut. 1, Basilar artery in prepontine cistern. 2, Hippocampus. 3, Lentiform nucleus.
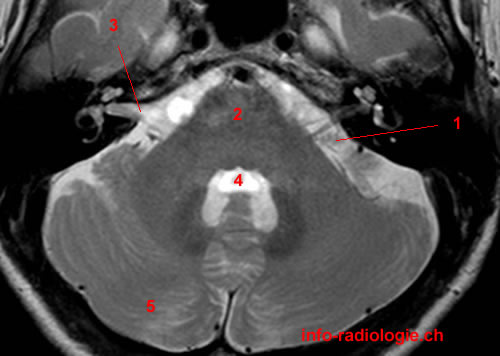
Cerebellopontine cistern

Brain MRI: axial cut (magnification) T2-weighted. 1, Cerebellopontine cistern. 2, Pons. 3, Internal acoustic meatus. 4, Fourth ventricle. 5, Cerebellar hemisphere.

Brain MRI: coronal cut (magnification) T2-weighted. 1, Cerebellopontine cistern. 2, Temporal lobe (right side). 3, Pons. 4, Hippocampus. 5, Internal acoustic meatus.
Cisterna magna

Brain MRI: sagittal T1-weighted cut. 1, Cisterna magna. 2, Medulla. 3, Pons. 4, Midbrain. 5, Cerebellum.

Brain MRI: axial T1-weighted cut. 1, Cisterna magna. 2, Cerebellum. 3, Medulla.

Brain MRI: coronal T1-weighted cut. 1, Cisterna magna. 2, Cerebellum. 3, Corpus callosum.
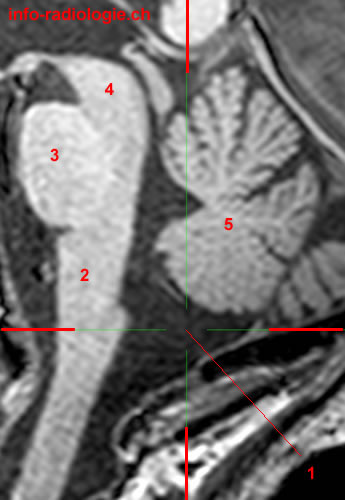
Superior cerebellar cistern

Brain MRI: sagittal T1-weighted cut. 1, Superior cerebellar cistern. 2, Tentorium cerebelli. 3, Cerebellum. 4, Pons. 5, Midbrain.

Brain MRI: axial T1-weighted cut. 1, Superior cerebellar cistern. 2, Cerebral aqueduct.

Brain MRI: coronal T1-weighted cut. 1, Superior cerebellar cistern. 2, Lateral ventricle. 3, Cerebellar hemisphere. 4, Tentorium cerebelli.
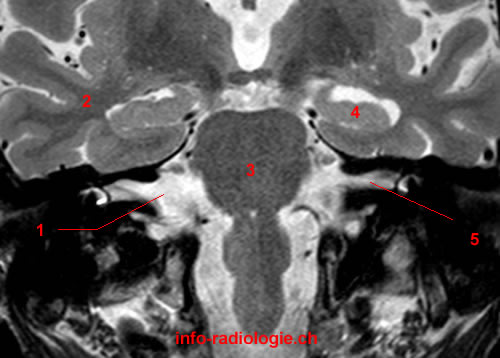
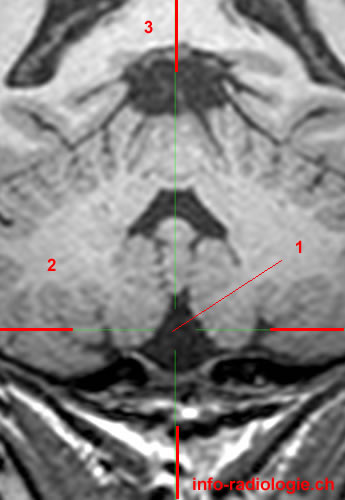
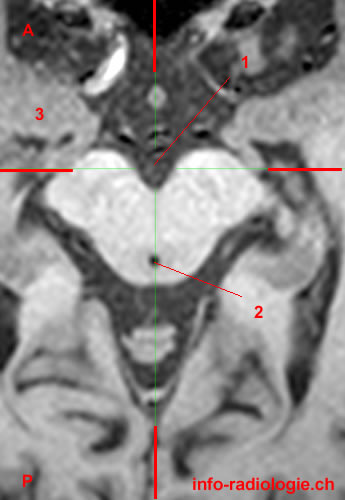
Interpeduncular cistern

Brain MRI: sagittal T1-weighted cut. 1, Interpeduncular cistern. 2, Midbrain. 3, Pons. 4, Medulla. 5, Fourth ventricle. 6, Cerebellum. 7, Third ventricle. 8, Corpus callosum.

Brain MRI: axial T1-weighted cut. 1, Interpeduncular cistern. 2, Cerebral aqueduct. 3, Hippocampus. A, Anterior. P, Posterior.

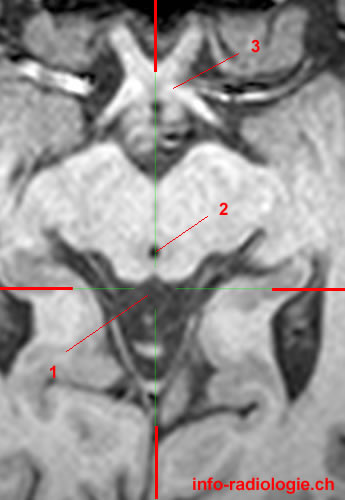
Brain MRI: coronal T1-weighted cut. 1, Interpeduncular cistern. 2, Hippocampus. 3, Third ventricle. 4, Lateral ventricle.
Ambient cistern

Brain MRI: sagittal T1-weighted cut. 1, Ambient cistern. 2, Splenium, corpus callosum. 3, Cerebellum. 4, Pons.

Brain MRI: coronal T1-weighted cut. 1, Ambient cistern. 2, Cerebral aqueduct 3, Lateral ventricle.

Brain MRI: axial T1-weighted cut. 1, Ambient cistern. 2, Lateral ventricle. 3, Fourth ventricle. 4, Cerebellar hemisphere.
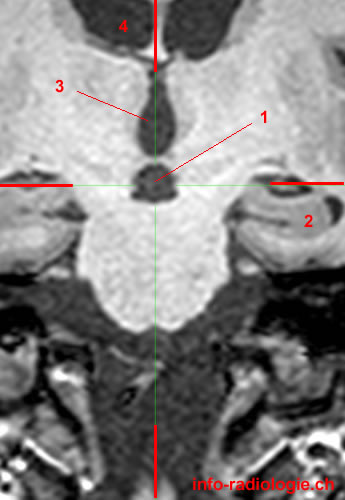
Quadrigeminal cistern

Brain MRI: sagittal T1-weighted cut. 1, Quadrigeminal cistern. 2, Midbrain. 3, Pons. 4, Medulla. 5, Cerebellum.

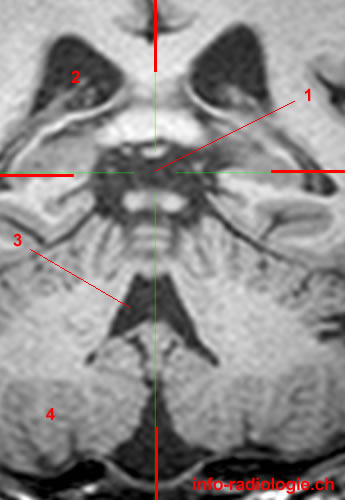
Brain MRI: axial T1-weighted cut. 1, Quadrigeminal cistern. 2, Cerebral aqueduct. 3, Optic chiasm.

Brain MRI: coronal T1-weighted cut. 1, Quadrigeminal cistern. 2, Lateral ventricle. 3, Fourth ventricle. 4, Cerebellar hemisphere.
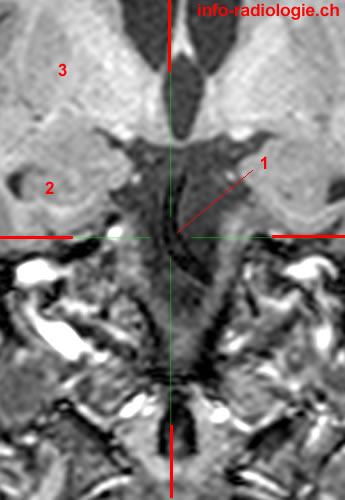
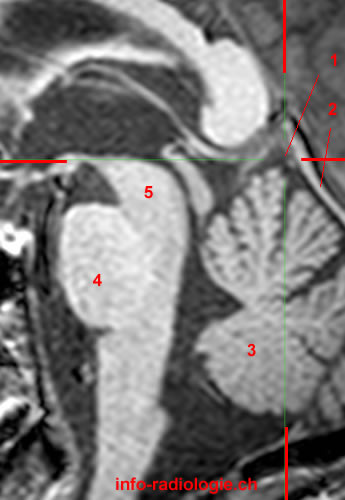
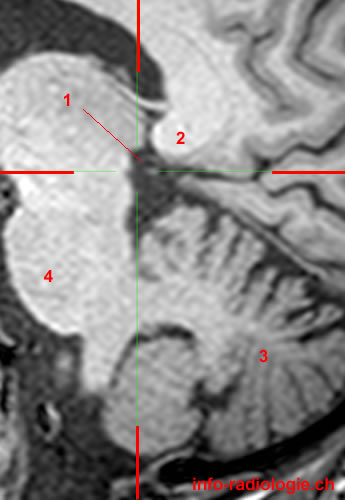
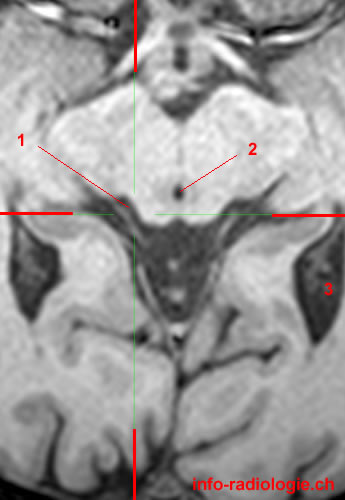
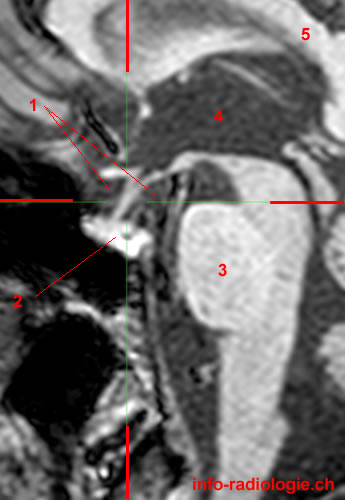
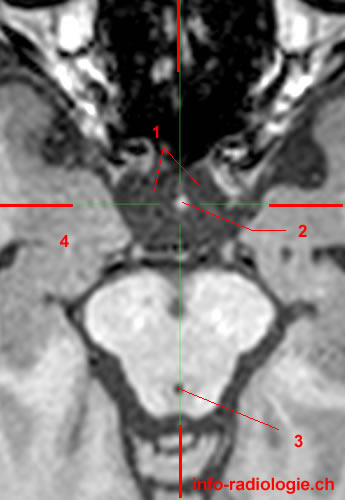
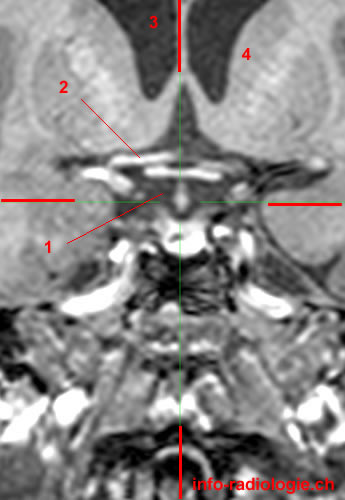
Suprasellar cistern

Brain MRI: sagittal T1-weighted cut. 1, Suprasellar cistern. 2, Pituitary gland. 3, Pons. 4, Third ventricle. 5, Corpus callosum.

Brain MRI: axial T1-weighted cut. 1, Suprasellar cistern. 2, Pituitary stalk. 3, Cerebral aqueduct. 4, Hippocampus.

Brain MRI: coronal T1-weighted cut. 1, Suprasellar cistern. 2, Anterior cerebral artery. 3, Lateral ventricle. 4, Caudate nucleus.
Reference:
• Harnsberger HR, Osborn AG, Ross JS, Moore KR, Salzman KL, Carrasco CR, Halmiton BE, Davidson HC, Wiggins RH. Diagnostic and Surgical Imaging Anatomy: Brain, Head and Neck, Spine. 3rd ed. Salt Lake City, Utah. Amirsys. 2007.